

Photo Lessons in Japan - Step4
Take Vertical Pictures
Cameras are designed for taking horizontal photos, including vide cameras. The view of human's eye is horizontally wide, and we feel horizontal photos more natural. However, portrait shooting is exceptional - we photographers also shoot many vertical pictures. Why?
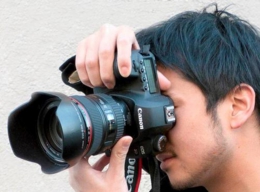
However, this is not an easy job - holding camera vertically without camera shake and press shutter release - would be strained shooting style. If you keep shooting in this style for a long time, your arms get tired, and the camera start to shake. The solution?
Practice Session F)
Take Vertical Pictures by "Rule of Thirds"
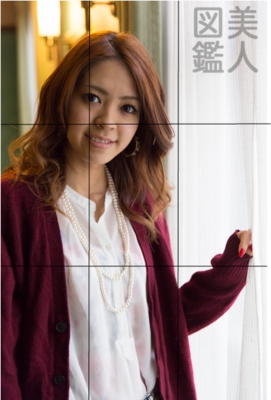
2) Show "rule of thirds" guideline or grids in your DSLR camera's view finder or LCD Monitor if possible. Place subject in line with the vertical guideline or grids.
3) Move focus points of your camera, place it on the subject. For a model shoot, place focus point on the model's eye (the eye which is closer to you). Then shoot!
4) Check the picture taken via LCD monitor. This time, please check the image angle carefully - vertical shootings often lead to crocked angles, due to the strained shooting style.
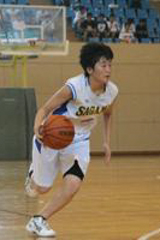
5) If you have a model for this practice session, take full length photo of the model - from top of head to bottom of shoes by vertical angle. You will find the picture look like a fashion portrait. If possible, please try to shoot kneeling down - that makes model legs longer in your photo, and the model seems much more fashionable!
Some other things you should know - PartII
1) ISO
However, this is a trade-off of the quality of final photos. If you apply high ISO number, you will boost up digital signal and noise together. Each camera manufacturer try to make camera with less noise under high ISO. That means, newer cameras generally produce better quality images under high ISO situation.
For these photo lessons, I would suggest apply ISO400 - most of DSLR cameras can produce quality images with ISO400. Under daylight conditions, ISO 100 or 200 are much more preferable.
2) Digital development of RAW file
In the digital development process of RAW files, you can adjust white balance and color, from vivid to subdued. You can also adjust brightness in certain extent.
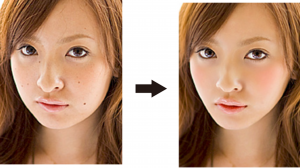
By using retouching software, you can eliminate unnecessary stuff and even change the shape of certain facial features. This is an example of retouching, some customers prefer these works.
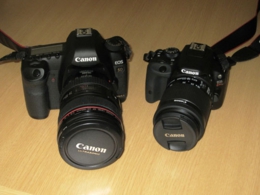
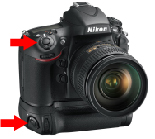
DSLR standard models come in APS-C, and professional models - which are Fill Size. What are different?
*Size of image sensor
- APS-C sensor = 23mm x 15mm: 345mm2
- Full Size sensor = 36mm x 24mm: 864mm2
Full size image sensor is twice or more larger than APS-C sensors. That allows Full Size cameras to generate good quality images even in high ISO settings. Also, the capacity of Full size image sensors are much wider from dark side to bright side.
*Lens
Each lens are specially designed for APS-C or Full size. Attaching an APS-C lens to a full size camera is not possible. On the other hands, you can put full size lens to APS-C cameras. However, the area of image captured is narrower on a APS-C camera. That means, even if same lens attached to both APS-C and Full Size cameras, the APS-C images will be more telescope, and Full Size images much wider.
*Size, Weight and Cost
Full Size camera bodies are large and heavy, and lens are heavy as well. This is due to the large sensor requiring large lens and large mirror, firm body, etc. Most likely Full Size camera bodies are twice or more expensive than APS-C, and Full Size lens are triple or more expensive than APS-C. Even though, professional photographers use Full Size - for us, the quality of the image comes first, absolutely number one priority.
However just for taking photo or hobby purpose, APS-C is suitable for most of users. By taking these photo lessons, you can take much impressive photos by using an APS-C camera, than a guy who owns expensive Full Size camera but do not know how to use it.
For moving to further lessons
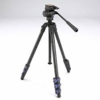
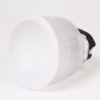
Now these photo lessons prologue - Step4 are completed. Your photography should be fully improved. In the further lessons, we will learn about lightings and also shooting at night. Moving forwards, just a camera would not be enough - we need a tripod, a speed light (flash light), a defuser, and a reflector like below. Now you will look like a professional photographer - won't you?

Photography Lessons Fee in Tokyo or Yokohama
Per person's charge JPY 10,000
- 1.5 Hours for private lessons
- 3 hours for group lessons (minimum 2 persons). Further discounts applied on 3 or more students group lessons.
- Available on Tokyo or Yokohama. Lessons in the other city (i.e. Kyoto) requires additional fee.
Kawaii Model Fee for the Photo Lessons
per person's charge JPY10,000
- 1.5 Hours for private lessons
- 3 hours for group lessons (minimum 2 persons). Further discounts applied on 3 or more students group lessons.
- A kawaii model will be arranged by Santos, subject to the availability of the model.

Above photo lessons are arranged by Santos Ota, Bijinzukan, Co., Ltd.